Difference between revisions of "Admin Guide Fastx"
m |
|||
| (2 intermediate revisions by 2 users not shown) | |||
| Line 1: | Line 1: | ||
| − | [[Category:HPC-Admin | + | [[Category:HPC-Admin|Fastx]]<nowiki /> |
| − | [[Category:HPC- | + | [[Category:HPC.NRW-Best-Practices|Fastx]]<nowiki /> |
| − | [[Category: | + | [[Category:Remote-Desktop]]<nowiki /> |
| + | [[Category:Fastx]]<nowiki /> | ||
| + | {{DISPLAYTITLE:Fastx (Admin Guide)}}<nowiki /> | ||
This article describes the use of FastX as a flexible and simple remote desktop solution for remotely working with graphical programs and for schools and workshops to avoid operating-system-specific software and problems. | This article describes the use of FastX as a flexible and simple remote desktop solution for remotely working with graphical programs and for schools and workshops to avoid operating-system-specific software and problems. | ||
Latest revision as of 19:09, 9 December 2020
This article describes the use of FastX as a flexible and simple remote desktop solution for remotely working with graphical programs and for schools and workshops to avoid operating-system-specific software and problems.
FastX2
Purpose
While command line based access to HPC systems is convenient for many use cases, there are many situations where a graphical remote desktop connections is required or convenient. For instance, Microsoft Windows has no native X-server support, which limits the usage of many tools, especially for debugging and performance analysis purpose. Even for users with Unix-based operating systems such a remote desktop session might be beneficial, because it is possible to reconnect to a session in case of a network interruption. Furthermore, it eases the organization and implementation of tutorials and workshops with hands-on sessions, because an intuitive and scalable access to the HPC system is possible.
FastX2 is one of the tools which enables remote desktop sessions for HPC clusters. One advantage of the tool is that you have the choice between a native desktop client or the access in a browser window. Although, the latter one does not achieve the performance of the native desktop client, it works pretty good in the situation of local workshops and tutorials. Here, no participant needs to install any additional software beside a web browser, which allows to start with the hands-on session immediately.
In order to avoid overloading the normal dialog systems, it is a good practice to provide dedicated nodes for the graphical remote sessions with stricter resource limitations (e.g., the physical memory or the available CPU cores). Furthermore, it is recommended to only support desktop environments like MATE and XFCE, because KDE as well as GNOME tend to consume many hardware resources and thus limit the user experiences as well as the scalability.
Differences to FastX (version 1)
- The licenses will be checked out by the server (not the client) during the login of the user
- The administrator only needs to download the server package
- Web clients are available
- The server site starts a
Xorginstead of aXrdpprocess
Licenses
The floating licenses can be checked out from a license server. After the installation you can use the following command to print the current status:
/usr/lib/fastx2/rlm/rlmutil rlmstat -avail
For each user starting a new session, one license is checked out (even if the user has multiple sessions on different servers). Each checked out license has a lifetime of 3600 seconds. Since the license is required by the server only, users can download the client on the Starnet website.
Native Client
In order to install the server, you just have to install the server package from the Starnet webpage (licence key required):
- Install rpm with:
rpm -ivh StarNetFastX2-VERSION.rpm
- Install license file in
/usr/lib/fastx2/var/license/license_server.lic. This file is used by the FastX2 server process to check out a license. - Install desktop environments, e.g.:
yum groupinstall "Mate Desktop"
yum groupinstall Xfce
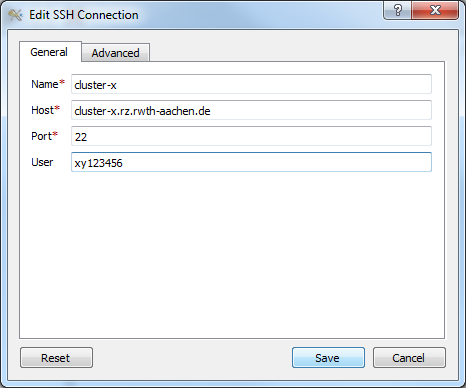
The FastX2 desktop clients already work after this step:
Browser-based Login
The fastx webserver is nodejs script which is running as user fastx. Usually, this user will be created by the installation script. However, this would mean that user and groups on different systems will get different UID/GIDs. Thus, it is a good practice to generate a global user and group via LDAP with unique UID/GID.
To install the webserver use the following command:
# /usr/lib/fastx2/install.sh

There is already a license file in /usr/lib/fastx2/rlm.
Would you like to activate a new license? [y/N] N
Install the FastX web server? [Y/n] Y
Installing Node.js... done.
Creating fastx user... Installing FastX server... done.
Creating a self-signed certificate... done.
A self-signed certificate has been created for this web server.
It will allow secure connections, but is vulnerable to a
man-in-the-middle attack. Because of this, connections will generate
warnings from the browser. These warnings (and the vulnerability) can be
eliminated later by installing a certificate from a certificate authority.
Setup initial admin user? [Y/n] n
Starting FastX web service...
Starting fastx:
nohup: redirecting stderr to stdout
done.
Install screenshot support? [Y/n] Y
Installing Screenshot support... done.
The browser addresses are:
http://hostname:3000     # the browser will be redirected to the https address automatically
https://hostname:3443
In order to get access in a browser the firewall rules have to be modified (if necessary).
A self signed certificate can be generated by the following commands:
cd /usr/lib/fastx2/var/certs
openssl req -x509 -nodes -newkey rsa:2048 -out request.pem -keyout key.pem -subj "/CN=$(hostname)" -days 730
mv request.pem cert.pem
chmod 400 key.pem
chmod 444 cert.pem
chown fastx. key.pem cert.pem
In order to restrict for TLSv1.2 or higher, add the following option to /usr/lib/fastx2/var/config/www.json (> RHEL 8):
"ciphers":"TLSv1.2:TLSv1.3"
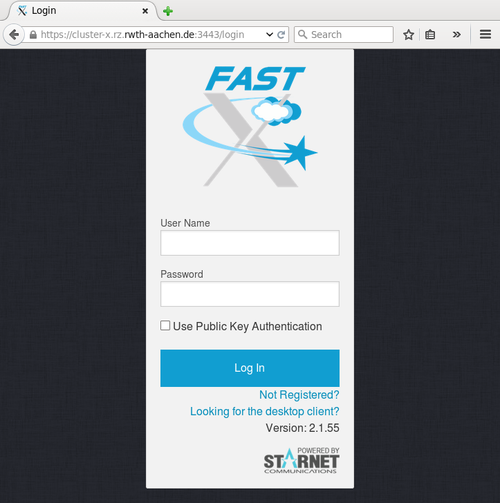
After that you can use the web browser client:
Desktop Environments
You can configure the available desktop environments in /usr/lib/fastx2/config/suggestions.conf. As mentioned above, it is recommended to only support desktop environments like MATE and XFCE, because KDE as well as GNOME tend to consume many hardware resources and thus limit the user experiences as well as the scalability.
GNOME 3 / Mate
- GNOME 3 requires a DRI-compatible X11 display to start (see
/usr/libexec/gnome-session-check-accelerated). FastX2 is supporting this since version 2.1.46. - In order to enable
gnome-terminalwithin a GNOME 3 (or Mate) environment, a ‘Locale’ has to be set when the desktop (i.e., the dbus daemon for the session bus) starts. This can be done by calling thegnome-sessionwith a setLANGenvironment variable. You can provide a ‘de’ and a ‘us’ variant in the suggestion file, for instance:
{"name":"MATE (de)","command":"LANG=de_DE.UTF-8 mate-session","geometry":"1024x768","id":"mate-de"},
{"name":"MATE (us)","command":"LANG=en_US.UTF-8 mate-session","geometry":"1024x768","id":"mate-us"},
- To deactivate GNOME 3 you can use the following command:
chmod g-o /usr/bin/gnome-session
KDE
There are some issues with KDE: * Memory leak in kded4. * The processes krunner and plasma-desktop permanently use 100% CPU time.
In order to deactivate KDE you can use the following command:
chmod g-o /usr/bin/startkde
Nvidia drivers
If you install the Nvidia driver package on the system, there might be the following issue: * The Nvidia install script replaces some system libraries. As a consequence, OpenGL programs will not work with FastX sessions. In order to avoid this the following environment variables can be set:
export LD_LIBRARY_PATH=/usr/lib/fastx2/xrdp/lib64:$LD_LIBRARY_PATH
export LIBGL_DRIVERS_PATH=/usr/lib/fastx2/xrdp/lib64/dri
- The Nvidia install script deletes the following FastX2 libraries:
/usr/lib/fastx2/xrdp/lib64/libEGL.so.*
/usr/lib/fastx2/xrdp/lib64/libGL.so.*
/usr/lib/fastx2/xrdp/lib64/xorg/modules/extensions/libglx.so
You can still start FastX2 sessions, but OpenGL/GLX applications will not work anymore. In order to solve the problem you have to reinstall the FastX2 rpm after installing the Nvidia driver package.
- The GNOME 3 desktop will not start anymore within the FastX2-Xorg-Server, because
/usr/libexec/gnome-session-check-acceleratedfails. Also programs likeglxinfowill not work anymore. Unfortunately, it is not enough to just unload the Nvidia kernel driver. Only deinstalling the complete package helps. According to Starnet the problem is that Nvidia uses a own GLX extension ‘nv-glx’, which is not supported by any remote X11 server.
Hints for web-based sessions
- An existing user session will be killed when restarting the fastx service or upgrading the software. Thus this should only be done during maintenance.
- In order to figure out whether an active user session exists, check if a process
/usr/lib/fastx2/api/linkis running with an user id.
Other known issues
| Issue | Reason | Solution |
|---|---|---|
Session start fails with Failed to start session and in the session_log you have following message: (EE) Could not create lock file in /tmp/.tX106-lock
|
The file /tmp/.tX106-lock already exists and is owned by another user.
|
Delete the file. |
Example Installation / Implementation Aachen CLAIX18
In the CLAIX18 system in Aachen we have two dedicate nodes running the FastX server:
- login18-x-1.hpc.itc.rwth-aachen.de
- login18-x-2.hpc.itc.rwth-aachen.de
The nodes are equipped with two Intel Platinium 8160 processors and 384 GB of memory each. They are accessible through the browser (for security reasons only within the university network):
This link will be redirected to a SSL-secured connection on port 3443.
Alternatives
- noVNC
- NoMachine
- x2go
- Xpra
- tmux (no GUI)
- screen (no GUI)

